When you’re designing an online course, every detail matters-especially how students access the content. If your course includes video lectures, you’re probably thinking about captions. But not all captions are the same. Closed captions and open captions serve different purposes, and choosing the wrong one can leave learners behind-especially those who are deaf or hard of hearing, non-native speakers, or learning in noisy environments.
What Are Closed Captions?
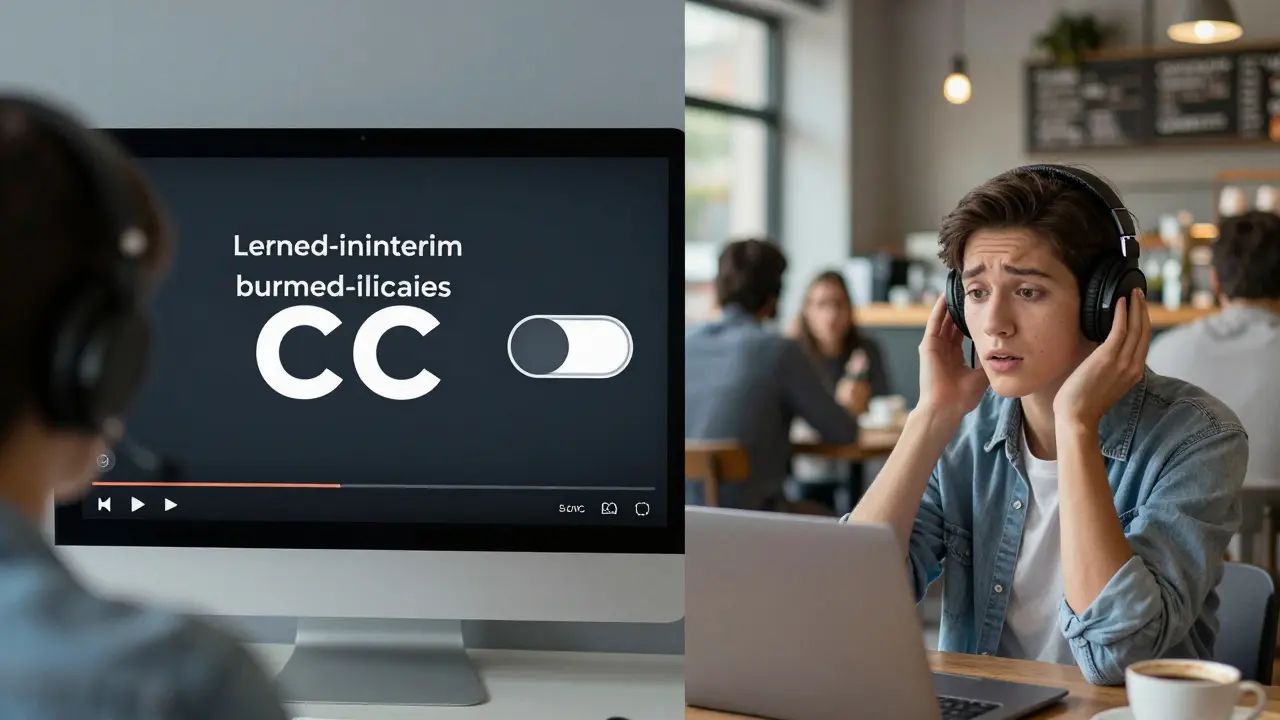
Closed captions are text overlays that can be turned on or off by the viewer. They’re embedded in the video file as a separate track, usually in a format like SRT or VTT. When you click the "CC" button on YouTube, Vimeo, or your LMS, you’re toggling closed captions.
They’re flexible. Learners can choose whether to see them, adjust the font size, change the color, or even pause and replay the text. This matters because not everyone needs captions all the time. A student might turn them on during a busy commute but turn them off when studying in a quiet library.
They also support accessibility standards. In New Zealand, the Disability Discrimination Act and the Web Content Accessibility Guidelines (WCAG 2.1) require digital content to be perceivable, operable, and understandable. Closed captions meet Level AA compliance, making them the standard for legally accessible education.
What Are Open Captions?
Open captions are burned directly into the video. They can’t be turned off. You see them whether you want to or not. Think of them like subtitles on a DVD or the text on a TV news broadcast.
They’re simple. No extra files. No toggle buttons. Just text that’s always there. That’s useful in situations where the viewer can’t control playback-like public displays in a campus hallway, a training kiosk in a hospital, or a video embedded in a social media post where users can’t adjust settings.
But there’s a trade-off. If you’re designing a course for a diverse group of learners, open captions remove choice. Someone who finds the text distracting can’t hide it. Someone with low vision can’t increase the font size. And if the caption style clashes with the video background, readability drops.
Why Accessibility Isn’t Just About Compliance
Many institutions add captions just to check a box. But real accessibility means removing barriers-not just avoiding lawsuits.
Research from Gallaudet University found that 75% of students who used closed captions in online courses reported improved comprehension, even if they weren’t deaf or hard of hearing. Why? Captions reinforce auditory input with visual text. That helps with focus, retention, and understanding complex terms.
Non-native English speakers benefit too. A student from Japan taking a business course in English might need captions to catch fast-paced explanations or unfamiliar vocabulary. A learner with ADHD might use captions to stay on track when their attention drifts.
Closed captions give control. Open captions don’t.
When to Use Closed Captions
Use closed captions when:
- Your course is hosted on platforms like Moodle, Canvas, or Kaltura
- You want learners to customize their experience
- You’re aiming for WCAG 2.1 Level AA compliance
- Your audience includes people with varying needs (hearing, language, attention)
- You plan to reuse or repurpose video content across platforms
Closed captions are the default choice for most academic courses. They’re the standard for a reason: they work for everyone, without forcing anyone to see something they don’t need.
When Open Captions Make Sense
Open captions are better when:
- The video will be shared on platforms that don’t support caption toggling (like Instagram Reels or TikTok)
- You’re using video in public spaces where viewers can’t interact with controls
- You’re creating a short promotional clip for a course and want to ensure captions are always visible
- Your LMS doesn’t support external caption files
But even here, think twice. If you’re embedding a video on your course homepage and your LMS supports closed captions, don’t burn them in. Keep them separate. You’ll thank yourself later when you need to fix a typo or update terminology.
Technical Reality Check
Some instructors assume open captions are easier because they’re "just part of the video." But that’s a myth.
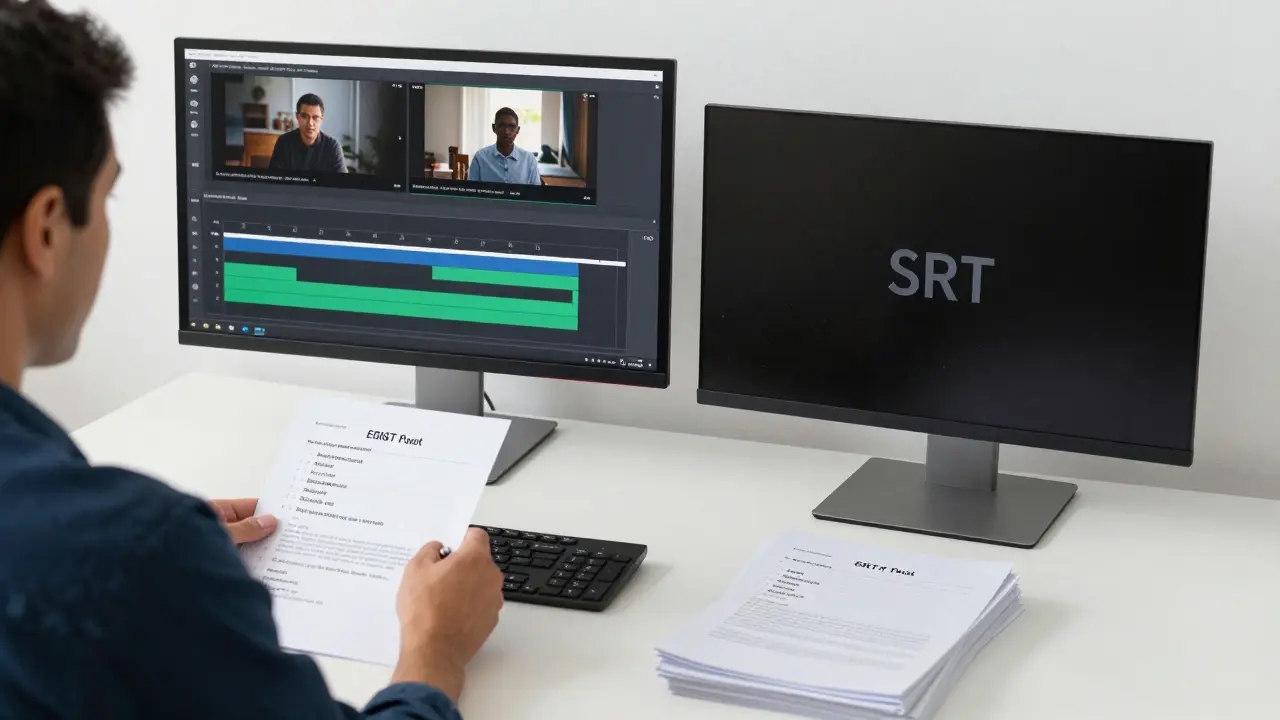
Editing a video with open captions means re-rendering the whole file every time you fix a spelling mistake, adjust timing, or update a term. That’s hours of work for a single correction. With closed captions, you edit a 5KB SRT file. Upload it. Done.
Tools like Otter.ai, Rev.com, or even YouTube’s auto-captioning (then manually corrected) make creating closed captions faster than ever. Most LMS platforms now let you upload caption files directly. You don’t need to be a tech expert.
And if you’re worried about time? Start small. Add captions to your most-viewed lecture first. Then expand. Accessibility isn’t an all-or-nothing project-it’s a habit.
What About Translation and Multilingual Learners?
Closed captions make translation easier. Once you have a clean SRT file in English, you can send it to a translator. Then upload the Spanish, Mandarin, or Samoan version as a separate track. Learners pick their language.
Open captions? You’d need to create a whole new video for each language. That’s expensive, slow, and unsustainable.
At the University of Auckland, a nursing course added closed captions in English, te reo Māori, and Mandarin. Enrollment from non-English speaking students jumped 22% in one semester. The captions didn’t just help with understanding-they signaled inclusion.
Common Mistakes to Avoid
Even with the best intentions, people mess up captions. Here’s what not to do:
- Using auto-generated captions without editing-errors in medical terms or formulas can be dangerous
- Putting captions in the wrong place on screen-they should be away from faces or important visuals
- Using low-contrast colors-white text on light gray is unreadable
- Not syncing timing properly-text that appears too late or disappears too fast confuses learners
- Assuming one size fits all-font size, speed, and style should be customizable
Test your captions. Watch your video with captions on, turn the sound off, and see if you can follow along. If you can’t, your learners won’t either.
Final Decision: Closed Captions Are the Smart Default
For 95% of online courses, closed captions are the clear winner. They’re flexible, compliant, scalable, and learner-centered. Open captions have their place-but only in very specific, controlled situations.
Don’t make accessibility an afterthought. Build it in from the start. Your students will notice. They’ll feel seen. And they’ll learn better.
If you’re starting fresh, use closed captions. If you’ve already burned in open captions, plan to re-record or re-edit those videos next term. It’s not just good practice-it’s the right thing to do.
Comments
Kendall Storey
Closed captions are the only way to go for any serious course design. Open captions are a relic from the DVD era-like using a rotary phone in 2024. You think you’re saving time by burning them in, but you’re just creating technical debt that’ll haunt you when you need to update a single term in a 20-minute lecture. SRT files are 5KB. Videos are 500MB. Do the math.
And don’t even get me started on accessibility as a checkbox. If you’re not thinking about the student with ADHD who needs captions to stay focused, or the ESL learner who’s catching every third word, you’re not teaching-you’re broadcasting.
Pamela Tanner
Well said. I’ve been teaching online for 12 years, and the difference between closed and open captions isn’t just technical-it’s ethical. When I first started, I used open captions because ‘it was easier.’ Then a student with low vision emailed me: ‘I can’t read the tiny white text on your blue background.’ I had no idea. That email changed everything. Now I use closed captions with customizable styles. No exceptions.
And yes, the Gallaudet study is real. I’ve seen it in my own classes. Students who never used captions before started using them after one module. Their quiz scores improved. Their engagement spiked. It’s not magic-it’s accessibility done right.
Megan Blakeman
I just want to say thank you for writing this. I’m a single mom working two jobs and taking online classes, and captions saved my GPA. I didn’t even know what WCAG was until last semester, but I knew I needed to see the words to keep up. I’m so tired of people treating accessibility like a luxury. It’s not. It’s survival.
Akhil Bellam
Ugh. Another ‘closed captions are better’ lecture. You people act like open captions are some kind of moral failure. Newsflash: most learners don’t care. They just want the video to play. And if they’re in a noisy cafeteria or a subway, they don’t want to fiddle with a ‘CC’ button-they want it ON. PERIOD. Stop over-engineering everything. Not everyone needs customization. Some just need content.
Also, ‘re-rendering the whole video’? Please. I’ve edited 300+ videos. It takes 12 minutes. You’re acting like it’s brain surgery. And yes, TikTok and Instagram don’t support SRT. So what? You’re designing for a platform that doesn’t allow customization? Then burn them in. Stop pretending your LMS is the center of the universe.
Amber Swartz
Okay, but can we talk about how tragic it is that we even have to argue about this? Like, imagine being a student and having to choose between ‘see the text’ or ‘see the professor’s face’ because the captions are burned right over their mouth. That’s not accessibility-that’s visual assault. And the fact that institutions still do this? It’s not negligence. It’s laziness dressed up as convenience.
I had a student cry in my office last year because she couldn’t read the captions on her biology video. The font was tiny. The color was gray-on-white. The timing was off. And the instructor said, ‘Just turn on the subtitles.’ But she didn’t know how. She was 72. And she’d never used a computer before. This isn’t about tech. It’s about humanity.
Richard H
Let’s be real-this whole ‘closed captions are superior’ narrative is just woke corporate propaganda. The government pushed this so they could force schools to spend more money on compliance. Real Americans don’t need captions. They just need to listen better. If you can’t follow a lecture in English, maybe you shouldn’t be in college. And why are we translating into Samoan? We’re not running a UN summit here.
Robert Byrne
Richard, your comment is not just wrong-it’s harmful. You’re dismissing the needs of millions of learners because it doesn’t fit your narrow worldview. Closed captions aren’t about ‘woke propaganda.’ They’re about equity. The fact that you think ‘listening better’ is the solution for someone who’s deaf or hard of hearing? That’s not just ignorance. It’s cruelty.
And your ‘Real Americans’ comment? That’s not patriotism. It’s exclusion. You want to know what’s un-American? Denying access to education based on your personal biases. The Constitution doesn’t say ‘only hearing people need to learn.’ It says ‘equal protection.’
ravi kumar
As someone from India who learned English through YouTube with captions, I can say this saved my career. I watched the same lecture 5 times because I couldn’t catch the words. With captions, I caught them the first time. Now I teach coding to 200 students a month. I always use closed captions. No one ever complained. Everyone benefited.
Kristina Kalolo
Interesting. I’ve never thought about the technical overhead of re-rendering videos with open captions. But I’m curious-what’s the average time it takes to create and sync closed captions for a 15-minute lecture using Otter.ai and manual correction? Is it under 30 minutes? And how accurate is the auto-generation for technical subjects like biochemistry or quantum physics?