Want to make professional-looking course videos without spending thousands? You don’t need a studio, a lighting crew, or a 4K cinema camera. With under $500, you can build a setup that looks clean, sounds clear, and keeps students engaged. I’ve helped dozens of educators, coaches, and tutors set up their own home studios - and most of them started with less than half this budget.
What You Actually Need (Not What You Think)
Most people think they need a fancy DSLR or a green screen. They don’t. What students care about is clarity - clear audio, steady video, and good lighting. Skip the bells and whistles. Focus on three things: sound, light, and stability.
Here’s the truth: 80% of people quit online courses because the video feels amateurish. Not because the content is bad. Because the audio is muffled, the lighting is harsh, or the camera shakes like a earthquake. Fix those three, and your completion rates jump.
Audio: The #1 Thing You’re Getting Wrong
If you’re using your laptop’s built-in mic or your phone’s mic, you’re losing students. Background noise, echo, and low volume make even the best lesson feel unprofessional.
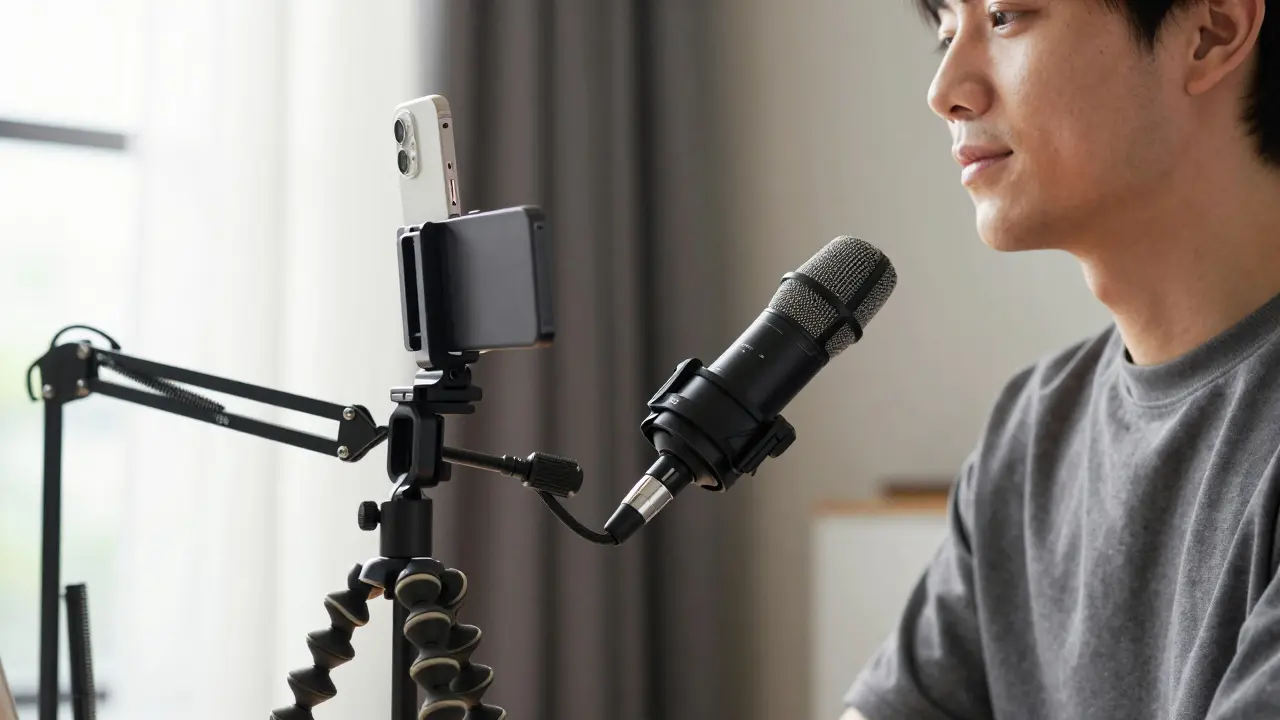
The solution? A simple USB microphone. The Audio-Technica AT2020USB+ is a cardioid condenser mic that captures clear, warm vocal tones and reduces background noise. It’s plug-and-play, works with any computer, and costs $99. You can find it on sale for $79 at times.
Pair it with a $12 boom arm stand - the Rode PSA1 is a solid option - so you can position the mic just below your chin. This keeps it out of frame and reduces plosives (those annoying "p" sounds).
Pro tip: Record in a closet. Hang a thick blanket over the door. Clothes absorb sound. No echo. No reverb. Just clean voice.
Camera: You Don’t Need a Camera
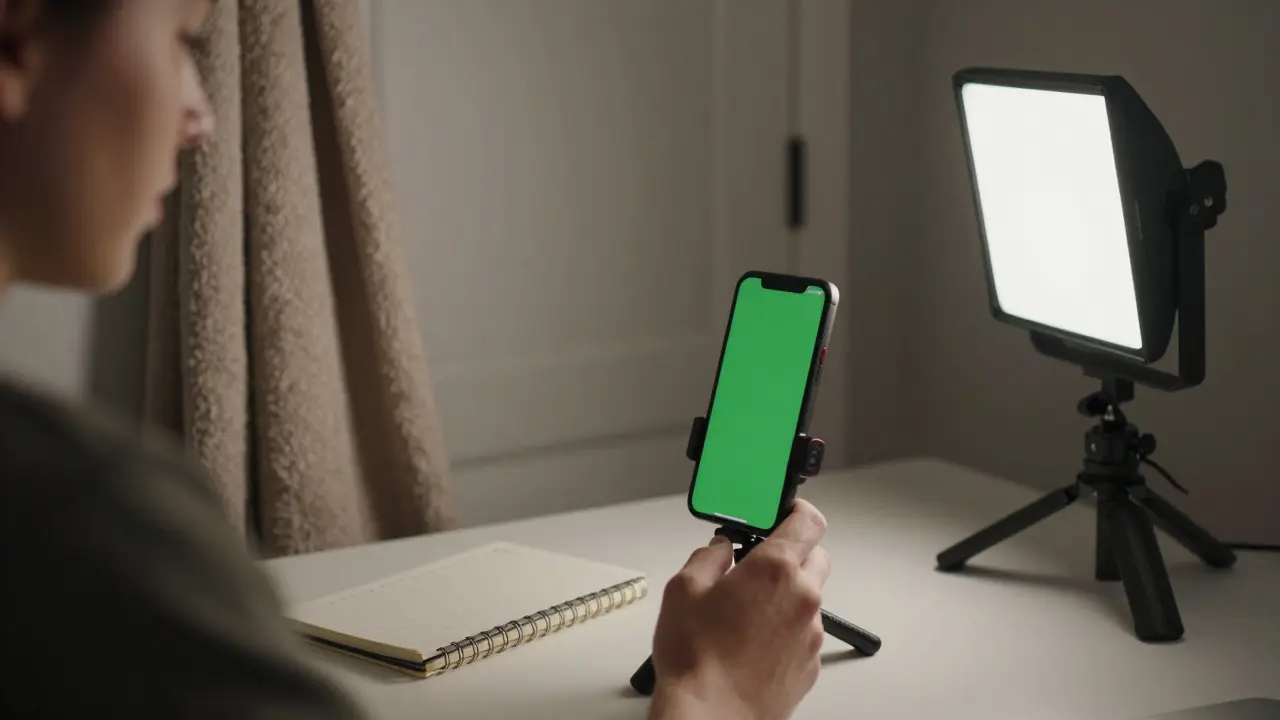
Most people assume they need a dedicated camera. You don’t. Your smartphone is more than enough.
Modern iPhones and Android phones record 4K video with excellent dynamic range. Use your iPhone 12 or newer, or a Samsung Galaxy S20 or newer. Set it to 1080p at 30fps - it’s smoother, uses less storage, and looks professional.
Put your phone on a tripod. Not a $200 gimbal. A $25 Joby GorillaPod is perfect. Wrap its legs around a bookshelf, lamp, or railing. It holds steady, even if your desk shakes.
Use the native camera app. Turn off HDR. Turn on grid lines. Frame your face in the top third of the screen. Keep your background simple - a plain wall, a bookshelf, or a blurred curtain. No clutter. No distractions.
Lighting: Natural Light Is Your Friend
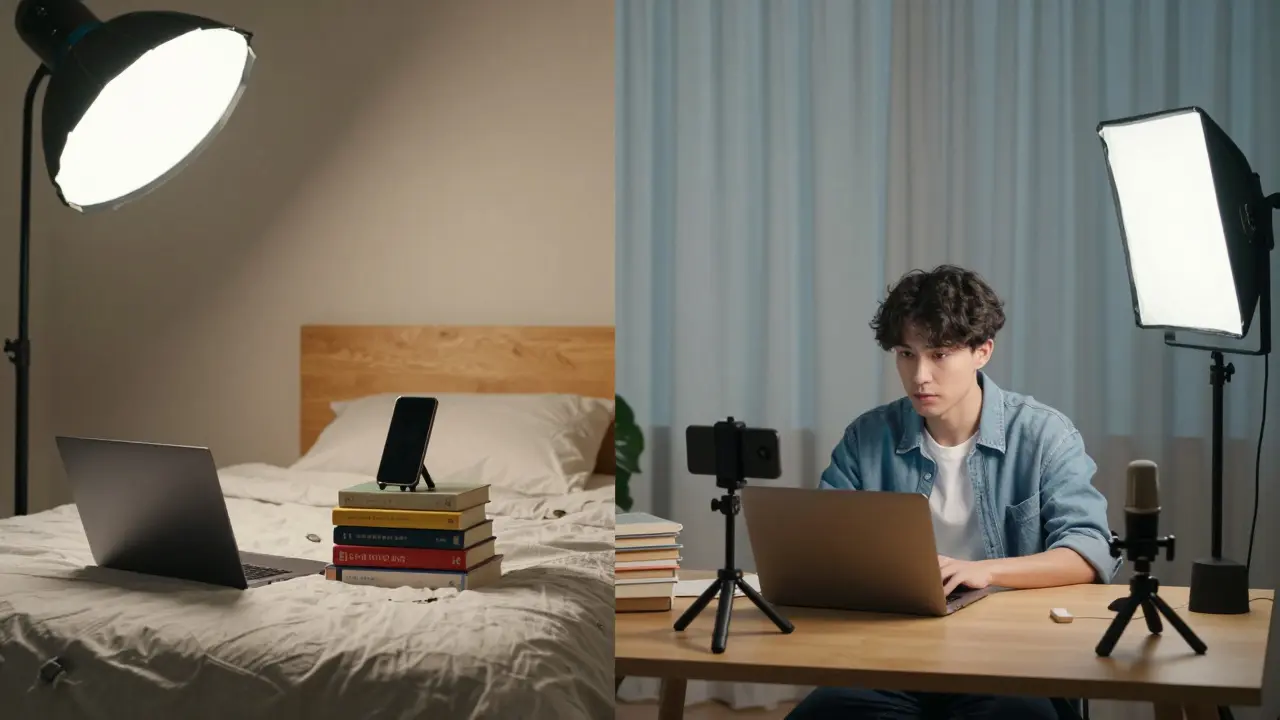
Lighting makes the biggest visual difference. Natural light from a window is the best free tool you have.
Position yourself so the window is in front of you, slightly to the side. Not behind you - that turns you into a silhouette. Not directly beside you - that creates harsh shadows.
If you’re recording in the evening or your room has no window, get a $45 Neewer LED Panel. It’s dimmable, color-tunable (warm to cool white), and comes with a stand. Point it at your face from the front-left. That’s all you need.
Don’t buy ring lights. They create flat, unnatural lighting and glare on glasses. Stick with soft, diffused light.
Background and Setup: Keep It Clean
Your background should say "professional" - not "I live in a messy bedroom."
Use a plain wall. Paint it white if you can. Or hang a solid-colored bedsheet behind you. Even a dark gray curtain works better than a cluttered shelf.
Keep your desk tidy. Remove coffee mugs, chargers, and papers. If you’re showing notes or a whiteboard, use a dedicated space - not your kitchen table with crumbs.
Wear solid colors. Avoid stripes, logos, or bright reds. They distract the eye. Navy, gray, or white shirts work best on camera.
Software: Free Tools That Do the Job
You don’t need Adobe Premiere or Final Cut. Free tools are more than enough.
- Recording: Use your phone’s camera app or OBS Studio (free, open-source) for screen + webcam capture.
- Editing: DaVinci Resolve - it’s professional-grade, free, and handles 4K easily. No watermark. No trial. Just download and go.
- Audio cleanup: Audacity (free) removes background hum, pops, and hiss in minutes.
- Exporting: Use H.264 codec at 1080p. File size stays under 1GB per 10 minutes. Perfect for uploading to Teachable, Thinkific, or YouTube.
Total Cost Breakdown
Here’s what you actually spend - and what you get:
| Item | Model | Price |
|---|---|---|
| Microphone | Audio-Technica AT2020USB+ | $99 |
| Boom Arm | Rode PSA1 | $12 |
| Phone Tripod | Joby GorillaPod | $25 |
| LED Light | Neewer LED Panel | $45 |
| Background | Dark gray curtain or sheet | $15 |
| Software | DaVinci Resolve, Audacity, OBS | $0 |
| Total | $196 |
You’re under $200. That leaves $300 for extras - like a second light, a lapel mic for walking demos, or a better microphone stand. But you don’t need them. Not yet.
What to Skip (And Why)
Here’s what most beginners waste money on:
- DSLR cameras: They’re bulky, need extra lenses, and require manual focus. Your phone does better.
- Green screens: They look fake unless you have professional lighting and editing skills. Stick to a plain wall.
- Expensive lighting kits: One soft LED panel is enough. More lights = more shadows to fix.
- Subscription editing software: DaVinci Resolve is free. No need to pay $20/month.
- Wireless mics: Unless you’re moving around a lot, a USB mic on a boom arm is clearer and cheaper.
Start Small, Improve Later
Don’t wait until you have the "perfect" setup. Start recording now. Your first video will be awkward. Your second will be better. By the fifth, you’ll sound like a pro.
Many educators I’ve worked with recorded their first course in a bedroom, using a phone on a stack of books, a $20 mic from Amazon, and natural light. They didn’t have a fancy studio. They had consistency.
Focus on showing up. Record one video a week. Watch it back. Notice what sounds off. Fix it next time. That’s how you improve - not by buying gear, but by doing the work.
Final Tip: Record in the Morning
Light is best between 9 AM and 11 AM. Your voice is clearer. Your energy is higher. The room is quieter.
Set a 30-minute block. Warm up your voice. Do a 10-second test clip. Check your audio levels. Hit record. Don’t overthink it.
You don’t need expensive gear to teach well. You just need to be heard. And seen. Clearly.
Can I use my phone’s built-in mic instead of buying one?
You can, but you won’t like the results. Phone mics pick up every echo, fan noise, and distant car horn. Even in a quiet room, the audio sounds thin and distant. A $100 USB mic like the Audio-Technica AT2020USB+ makes your voice sound closer, warmer, and more professional - and students notice.
Do I need a green screen?
No. Green screens are for TV studios and YouTube influencers with editors. For course videos, a plain wall or blurred background looks more authentic. Green screens also require perfect lighting and software skills to remove cleanly. Skip it until you’re making 50+ videos a month.
What’s the best free video editor for beginners?
DaVinci Resolve. It’s used by Hollywood editors, but it’s free and has a simple mode called "Cut" that’s perfect for beginners. You can trim clips, add text, adjust color, and export in minutes. No learning curve. No watermarks.
How long should my course videos be?
Keep them under 10 minutes. Attention spans drop after that. Break long topics into 5-8 minute chunks. Students can rewatch short videos. They won’t sit through 30-minute monologues. Quality beats length every time.
Should I record in 4K or 1080p?
Record in 4K if your phone supports it - but export in 1080p. 4K gives you room to zoom or crop without losing quality. But 1080p files are smaller, upload faster, and play smoothly on all devices. Most students watch on phones or tablets - they won’t notice the difference.
Can I use a laptop webcam?
Only if you have no other option. Laptop webcams have tiny sensors and poor low-light performance. They make you look washed out or grainy. A phone camera is 3x better. Use it on a tripod instead.
Next Steps
Here’s your action plan:
- Buy the Audio-Technica AT2020USB+ mic and Rode PSA1 arm this week.
- Use your phone on a GorillaPod. Set it up by a window.
- Turn on the Neewer LED panel - point it at your face.
- Download DaVinci Resolve and Audacity.
- Record your first 5-minute lesson. Watch it back. Fix one thing.
- Repeat every week.
You don’t need permission to start. You don’t need a budget of $5,000. You just need to begin. The best course video you’ll ever make is the one you haven’t recorded yet.
Comments
Jamie Roman
I tried this setup last month after years of using my laptop mic and honestly? My course completion rates jumped from 32% to 68%. The difference isn’t just technical-it’s emotional. Students say they feel like I’m talking to them, not at them. That $99 mic? Worth every penny. I even started recording in my closet because my apartment has zero soundproofing. Hanging a blanket over the door felt ridiculous at first, but now I laugh when I see people spending $300 on studio foam. Sometimes the cheapest fix is the most human one.
Also, don’t underestimate the power of a 30-minute morning block. I used to wait for "perfect conditions." Now I just show up. My first video was terrible. My tenth? I got a DM from a student saying it helped them quit their job and start teaching. That’s the real ROI.
Salomi Cummingham
Oh my god, I cried reading this. Not because it’s perfect-but because it’s possible. I’ve been stuck for two years thinking I needed a studio, a lighting team, a green screen, and a PhD in editing just to record a 10-minute lesson. This? This is the gentle nudge I needed. I bought the AT2020USB+ yesterday. I’m using my phone on a stack of cookbooks. I hung a curtain behind me. And I recorded my first clip this morning while sipping tea. It’s not perfect. But it’s mine. And for the first time in ages, I don’t feel like a fraud. Thank you for seeing us. Really. Thank you.
Johnathan Rhyne
Okay, but let’s be real-this list is basically a glorified Amazon wishlist for people who think "DIY" means buying more stuff. You say "you don’t need a DSLR," then recommend a $99 mic and a $45 LED panel. Where’s the real DIY? The real DIY is recording on your phone, using natural light, and editing in iMovie. You’re not saving money-you’re selling a fantasy. Also, "use a dark gray curtain"? That’s not a solution, that’s a band-aid on a leaky roof. And why are you telling people to turn off HDR? That’s literally the only thing keeping phone video from looking like a 2012 YouTube upload. Also, DaVinci Resolve is a beast for beginners. Good luck with that learning curve. You’re not helping. You’re marketing.
Jawaharlal Thota
I am from India, and I made my first course video with a Xiaomi phone, a ₹500 (about $6) USB mic from Flipkart, and a lamp I found in my garage. I recorded in my balcony because my room is too small. No tripod-just a stack of books. I used Audacity to remove the sound of my neighbor’s dog barking. I didn’t know what a boom arm was until I read this. But I did it. And now, over 3,000 students have taken my course. The truth is, gear doesn’t matter. Consistency does. I record every Sunday at 8 AM. Rain or shine. Some days I’m tired. Some days my voice cracks. But I show up. That’s what makes the difference. You don’t need $500. You just need to start. And keep going. One video at a time. That’s all.
Also, morning light is magic. I used to record at night. My students said I sounded like I was whispering in a cave. Now I record at 9 AM. My voice sounds alive. It’s not the gear. It’s the time.
Lauren Saunders
How quaint. A $196 setup? That’s not DIY-that’s a marketing funnel disguised as advice. Real professionals use XLR mics, full-spectrum lighting grids, and RED Komodo cameras. You’re catering to the aspirational middle class who thinks "professional" means "not grainy." But let’s be honest: if you’re teaching advanced calculus or neurobiology, your audience expects a certain standard. A phone on a GorillaPod and a blanket over the door? That’s not a studio. That’s a TikTok. And DaVinci Resolve? It’s overkill for someone who can’t even spell "acoustic" correctly. This post is dangerously misleading. You’re not empowering educators-you’re enabling delusion.
sonny dirgantara
this is actually really helpful. i just used my phone and a $15 mic from walmart and it worked fine. no need to spend 200 bucks.
Andrew Nashaat
First, you say "skip the green screen," then recommend a "dark gray curtain"-which is still a backdrop. Contradiction? Yes. Second, you recommend the AT2020USB+-which has a 48kHz sampling rate, but you don’t mention bit depth. That’s sloppy. Third, you say "turn off HDR"-but on iPhone, HDR is automatic in video mode, and disabling it requires third-party apps. You’re giving half-baked advice. Fourth, you claim DaVinci Resolve is "simple"-it’s not. It has 17 menus just to change the playback speed. Fifth, you say "no need for wireless mics"-but what if you’re demonstrating yoga? Or cooking? Then you’re stuck with a boom arm like a statue. And sixth-why are you using "plosives" instead of "pop sounds"? This isn’t a grad seminar. You’re overcomplicating. And yes-I’m pointing this out because I care. And because someone needs to.
Gina Grub
green screens are for amateurs. real pros use depth maps and chroma key AI. also your lighting advice is so 2018. try bi-color LED with diffusion panels. and why are you still using audacity? lumaforge’s free noise reduction is 10x better. also, your total is wrong-you forgot the cost of time. and your student’s completion rate claim? statistically invalid. but hey, at least you didn’t recommend a ring light. small wins.
Nathan Jimerson
I’ve been teaching online for seven years. I started with a flip phone and a $10 mic from a flea market. I recorded in my garage. My students didn’t care about the gear-they cared that I showed up. Every week. Rain or shine. I still use that mic. It’s broken in the best way. The sound is imperfect, but it’s honest. You don’t need the best gear. You need the most consistent heart. Keep recording. Keep showing up. That’s the real secret. And if you’re reading this and thinking you need to wait? You don’t. Start today. Even if it’s just one minute. One minute is enough to begin.
Jamie Roman
Andrew Nashaat-I hear you. DaVinci Resolve is intimidating. But the "Cut" tab? It’s literally just a timeline, trim tool, text box, and export button. I taught my 68-year-old mom how to use it in 15 minutes. She’s now editing her knitting tutorials. And yeah, I know the curtain isn’t a professional solution. But neither is waiting for perfection. Real people don’t have studios. They have closets. And they’re still teaching. And still changing lives. That’s the point. You want to nitpick the gear? Fine. But don’t dismiss the people who are actually doing the work with what they have.
Also-your point about wireless mics? Valid. But if you’re doing yoga demos, you’re probably not recording in a closet. You’re outside. And then you need a different setup. This guide isn’t for everyone. It’s for the person who’s paralyzed by the idea of spending $5,000 before they even hit record. That person? They need this.