Most online course creators start with a phone, a quiet room, and hope. But if you want students to stick around, your video quality needs to match your content. A muddy audio clip or a shaky camera doesn’t just look unprofessional-it tells learners you don’t take their time seriously. Setting up a real home video studio isn’t about buying the most expensive gear. It’s about fixing the three things that make people click away: bad sound, bad light, and bad framing.
Start with Sound-It’s More Important Than You Think
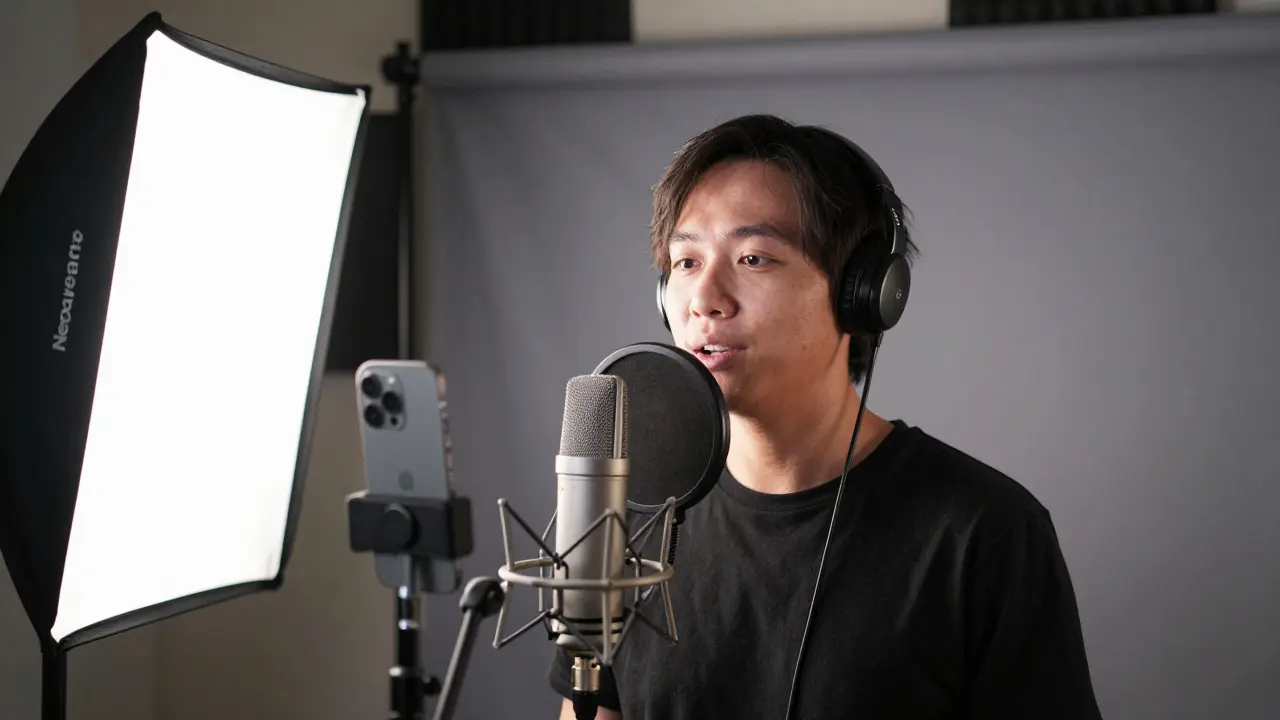
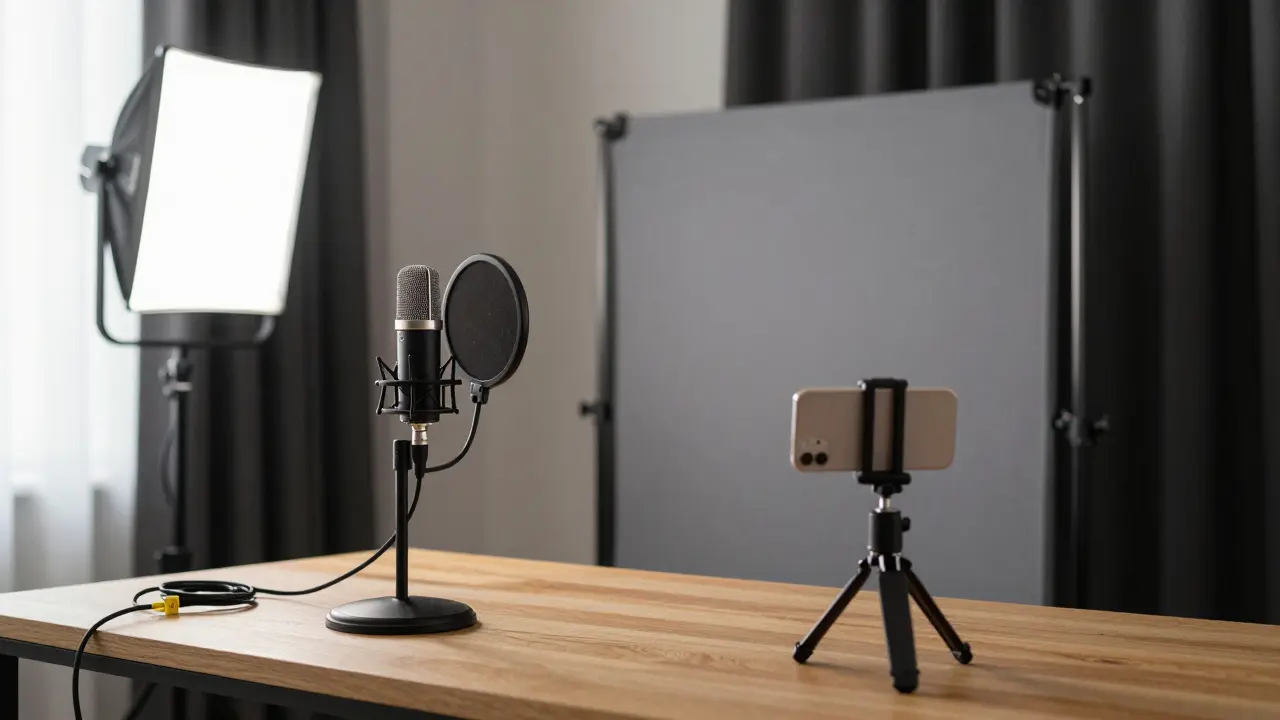
People will forgive a slightly dark room. They won’t forgive audio that sounds like it was recorded in a tin can. Most built-in microphones on laptops or phones pick up every echo, every fan, every footstep. The fix? A simple USB microphone. The Shure MV7 is the most common choice among educators because it plugs directly into your computer, handles both voice and background noise well, and costs under $300. If you’re on a tighter budget, the Audio-Technica AT2020USB+ delivers clear, warm audio for under $150.
Place the mic about 6 to 8 inches from your mouth, slightly off to the side so you don’t blast it with plosives (those hard "P" and "B" sounds). Use a pop filter-$10 on Amazon-and hang it between you and the mic. Don’t forget to test your audio before recording. Say something like, "Testing, one, two, three," then play it back. If you hear breathing, rustling, or a buzz, fix it before you start filming.
Lighting That Makes You Look Like You Belong on Screen
Natural light is great-until the sun moves or clouds roll in. For consistent results, use three-point lighting: key light, fill light, and back light.
The key light is your main source. Place it at a 45-degree angle in front of you, slightly above eye level. A Neewer 660 LED panel ($70) is bright enough, adjustable, and doesn’t overheat. The fill light softens shadows on the opposite side. Use a smaller LED panel or even a white foam board to reflect light back. The back light (or rim light) separates you from the background. Point it at your shoulders from behind. It adds depth and makes you look less flat.
Set your camera’s white balance to match your lights. If you’re using warm LED bulbs, set your camera to 3200K. If you’re mixing daylight and LEDs, use a gray card or just set it manually in your camera settings. Avoid overhead lights-they cast shadows under your eyes and nose. And never film with a window behind you. That turns you into a silhouette.
Camera Setup-No Need for a DSLR
You don’t need a $2,000 camera. Most modern smartphones record 4K video. An iPhone 15 or Samsung Galaxy S24 will do fine if you use it right. Mount it on a tripod-no handheld shots. A Manfrotto PIXI Mini Tripod ($30) holds your phone steady and fits on a desk. If you want better framing, get a small external camera like the Logitech C920 ($60). It’s plug-and-play, records 1080p at 30fps, and has a wide field of view perfect for talking-head videos.
Frame yourself so your head and shoulders fit comfortably in the shot. Leave a little space above your head. Don’t cut you off at the neck. Use the rule of thirds: imagine your screen divided into nine equal boxes. Place your eyes on the top horizontal line. That’s where viewers naturally look.
Background Matters-Keep It Clean, Not Cluttered
A messy bookshelf, laundry pile, or kitchen counter in the background distracts from your message. Even if it’s "your space," it tells viewers you’re not serious about production. Use a solid-colored wall. A gray or dark blue backdrop works best-it’s neutral, professional, and doesn’t compete with your skin tone. You can buy a collapsible fabric backdrop for under $40 on Amazon.
If you can’t control your background, use a virtual background in your recording software. Zoom, OBS Studio, and Ecamm Live all support this. But don’t use animated backgrounds or blurry photos. They look cheap and can glitch when you move. Stick to simple gradients or solid colors. Your credibility depends on how clean your setup looks.
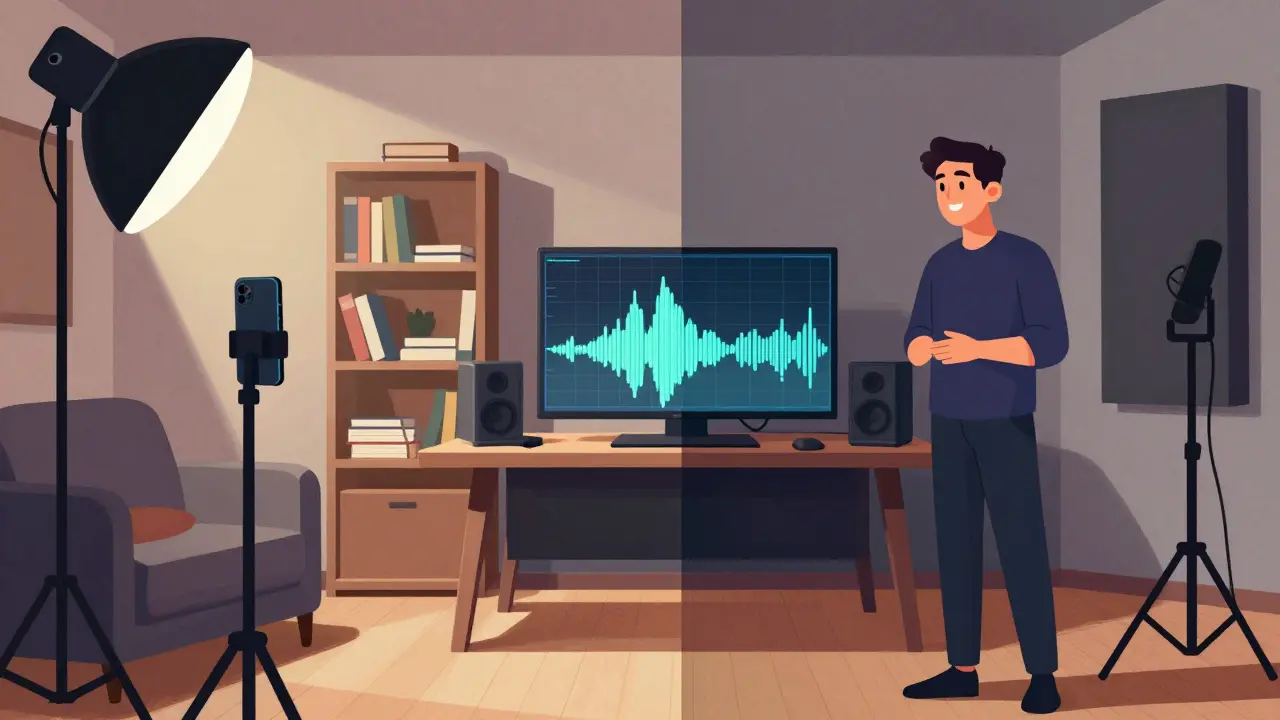
Software-Record, Edit, and Export Like a Pro
Recording is only half the battle. You need to edit out mistakes, pauses, and background noise. OBS Studio is free and lets you record your screen, camera, and audio all at once. It’s used by thousands of educators because it’s reliable and doesn’t watermark your videos.
For editing, DaVinci Resolve is the best free option. It’s used in Hollywood, but the interface is simple enough for beginners. Cut out long pauses, fix audio levels, add a lower-third with your name and course title, and export in H.264 MP4 format at 1080p. Don’t upload 4K unless you’re targeting YouTube Premium viewers-it just makes your files huge and slows down loading.
Always record in a quiet room. Close windows. Turn off fans, AC, and the refrigerator. Use a door draft stopper or a rolled-up towel under the door. Record during the quietest part of your day-early morning or late evening works best.
Consistency Is Your Secret Weapon
The best online courses don’t win because of fancy effects. They win because they feel familiar. Same lighting. Same background. Same mic position. Same tone. Students subconsciously trust repetition. Set up your studio once, take a photo of it, and return to that exact spot every time you record.
Label your cables. Tape your mic stand. Write down your lighting settings. Create a checklist: mic on, lights on, camera framed, audio levels green, background clear. Do this every time. It takes 90 seconds. It saves you hours of re-shoots.
Start small. You don’t need all this gear on day one. Get a mic and a tripod. Film one lesson. Watch it back. Ask yourself: "Would I pay for this?" If the answer is no, fix the sound. Then the light. Then the framing. One step at a time.
Common Mistakes to Avoid
- Using auto-focus that hunts during recording-switch to manual focus.
- Wearing busy patterns-stripes and checks create moiré effects on camera.
- Recording in a room with hard surfaces-add a rug, curtains, or foam panels to reduce echo.
- Forgetting to charge your camera or phone mid-session-always have a backup battery.
- Editing too much-your personality matters more than perfect cuts.
What You Need to Start Today
You can build a working home studio for under $300:
- Microphone: Audio-Technica AT2020USB+ ($140)
- Tripod: Manfrotto PIXI Mini ($30)
- Lighting: Neewer 660 LED panel ($70)
- Backdrop: 5x7ft gray fabric ($40)
- Pop filter: $10
- Free software: OBS Studio + DaVinci Resolve
That’s it. No need for green screens, ring lights, or studio monitors. Just clear audio, even light, and a steady shot. The rest comes from your teaching.
Do I need a green screen for my online course studio?
No. Green screens are useful if you want to replace your background with images or slides, but they’re not necessary for most course creators. A solid-colored wall or backdrop looks more professional and avoids the common glitches that come with chroma keying. Unless you’re doing animated lessons or virtual tours, skip the green screen.
Can I use my smartphone instead of a camera?
Yes, and many top course creators do. Modern smartphones record 4K video with excellent color and detail. Just make sure you use a tripod, lock your focus and exposure, and record in a well-lit room. Avoid zooming in digitally-it reduces quality. Use the rear camera, not the front-facing one, for better resolution.
How do I reduce echo in my home studio?
Echo happens when sound bounces off hard surfaces like walls, floors, and windows. Add soft materials: a thick rug, curtains, or even a stack of blankets behind you. You can buy affordable acoustic foam panels for $20-$50 and stick them on the walls near your recording spot. Even a bookshelf full of books helps break up sound waves.
Should I record in 4K or 1080p?
Record in 4K if your camera supports it, but export in 1080p. 4K gives you flexibility to crop or zoom in during editing without losing quality. But uploading 4K files takes longer, uses more bandwidth, and most viewers won’t notice the difference on a phone or laptop screen. 1080p is the sweet spot for balance between quality and file size.
What’s the best free editing software for beginners?
DaVinci Resolve is the best free option. It’s powerful enough to remove background noise, adjust color, and add text overlays. It’s used by professionals, but the interface is intuitive once you learn the basics. If you want something even simpler, try CapCut (mobile or desktop) or iMovie (for Mac users). Both are easy and free.
If you’re serious about teaching online, your studio is your classroom. Treat it like one. Clean, consistent, and calm. Your students will notice. And they’ll keep coming back.
Comments
amber hopman
I started with just my iPhone and a desk lamp, and honestly? It worked fine for my first course. But after watching my first video back, I cringed at how muddy my audio sounded. Bought the AT2020USB+ after reading this and holy hell, the difference is night and day. No more sounding like I’m talking through a cardboard tube.
Also, the pop filter? $10 well spent. I used to blow out every P and B like I was yelling at a neighbor. Now it’s smooth. Even my students noticed.
Don’t overthink it. Start small. Mic + tripod + natural light. You’ll be amazed how much better you look and sound just by fixing those three things.
Jim Sonntag
Wow. Someone actually wrote a 2000-word essay on how to not sound like a robot trapped in a microwave. Who knew? I thought we were just supposed to talk into our phones and hope for the best.
Also, green screens? Nah. My background is a laundry pile and a half-dead plant. That’s my brand now. Authentic chaos. Call it ‘Boho Academic’.
Deepak Sungra
Bro, I tried the Neewer LED panel and my face looked like I was in a hospital interrogation room. Too harsh. I had to dim it to 30% and put a white sheet over it. Now I look like I’m in a Netflix documentary about depression.
Also, why are we all pretending we have time to set up three-point lighting? I record at 11pm after my kid sleeps. I turn on one lamp, hit record, and pray. That’s my studio. No tripod. No pop filter. Just me, my voice, and the sound of my cat walking on the keyboard.
But hey, at least my students say I’m ‘relatable’.
Samar Omar
It’s fascinating, isn’t it, how the entire pedagogical paradigm has been subsumed by the aesthetics of digital production? We’ve moved from Socratic dialogue to microphones with built-in noise gates and color-corrected LED panels. The true art of teaching-nuance, vulnerability, organic thought-has been commodified into a 1080p checklist.
I mean, yes, the AT2020USB+ is technically superior, but are we not losing something sacred in the pursuit of sonic perfection? When did ‘clarity’ become synonymous with ‘authenticity’? I’ve heard students say they prefer the warmth of a slightly distorted phone recording-it feels human.
And yet, I still bought the gray backdrop. Because even rebels must conform to the algorithm.
chioma okwara
yo u spelled ‘microphone’ wrong in the title lol. its mic-ROH-fone not mic-ROH-fone. and u said ‘usb microphne’ twice. fix it. also why u use ‘its’ instead of ‘it’s’? its not a possessive. u dumb. also i used my phone and a pillow behind me and got 10k views. u overthinkin. just talk.
John Fox
Just got the Manfrotto PIXI. Best $30 I’ve spent in years. No more shaky head. Also turned off the AC and used a towel under the door. Game changer.
DaVinci Resolve is wild. Took me 3 days to figure out how to cut a pause. Now I’m editing like a pro. Or at least like someone who doesn’t sound like they’re yelling into a tin can.
Tasha Hernandez
Let’s be real-this whole ‘home studio’ thing is just capitalism’s way of making teachers feel guilty for not being YouTubers. You’re not selling a product. You’re sharing knowledge. But sure, let’s spend $300 on lighting so you don’t look like a ghost in your own video.
I used to record in my bathroom because the tiles killed the echo. Now I’m told I need a ‘rim light’ and a ‘gray backdrop’ and a ‘checklist.’ I miss the days when ‘professional’ meant you didn’t wear pajamas on camera.
And don’t even get me started on ‘consistency.’ What happened to ‘just show up and teach’?
Anuj Kumar
Why do you trust these ‘experts’? Shure MV7? That’s just marketing. My cousin in Delhi uses a $20 mic from AliExpress and his videos get more views. You think lighting matters? Nah. People care about what you say, not how shiny your forehead looks.
And DaVinci Resolve? Too complicated. I use TikTok editor. Works fine. Also, why do you need a backdrop? My wall has my kid’s drawings. That’s my brand. Real. Human. Not some corporate gray box.
This whole guide is a scam. Just talk. That’s it.
Christina Morgan
Thank you for this. Seriously. I’ve been teaching for 8 years and only just realized how much my shaky phone footage and echoey living room were hurting my credibility.
I followed your advice step by step-mic first, then lighting, then the backdrop. Took me two weeks. I filmed one lesson. Watched it back. I cried. Not because I looked bad-but because I finally felt like I was giving my students the respect they deserve.
Also, the checklist? Life saver. I print it out and tape it to my monitor. Every morning, I tick them off. It’s my ritual. My version of mindfulness.
You don’t need to be a producer. You just need to be intentional. And that’s the real secret weapon.